

Prefab Concrete House Mould How to Choose the Right One for Your Build
2026-08-19
Choosing the right prefab concrete house mould can make or break your build—poor fit, weak corners, or inconsistent panel thickness can cause costly delays. Whether you're a contractor scaling up production or a self-builder tackling your first modular project, the mould you select directly affects structural integrity and finish quality. At LugongMachinery, we've seen how the wrong choice leads to wasted concrete and rework. This guide cuts through the confusion and gives you practical criteria for evaluating mould design, material, and dimensional accuracy—so you can pour with confidence from the very first panel.
What Kind of Structure Are You Pouring?
Before you order a single yard, stop and think about what exactly you're building. A 4-inch patio slab and a 10-inch foundation wall don't just look different—they behave differently under load, weather, and time. The shape and purpose of the form dictate everything from mix slump to rebar spacing, and guessing here can lead to cracking, spalling, or worse.
Flatwork like driveways, walkways, and shed pads wants a relatively dry mix so it holds an edge and finishes without bleeding. Tall vertical pours—walls, columns, piers—need something more flowable or you'll end up with rock pockets and voids around the reinforcement. If the structure carries vehicles or holds back soil, the concrete has to reach a certain strength before you even think about stripping forms.
Also pay attention to how the pour will be accessed. A monolithic slab with thickened edges can often be placed straight from the truck, but narrow foundation stems or ICF walls might require a pump or a wheelbarrow crew. Matching the mix, the forms, and the placement method to the structure is the difference between a job that lasts thirty years and one you'll be chipping out next spring.
Steel, Fiberglass, or Timber: Which Mould Material Fits Your Site?
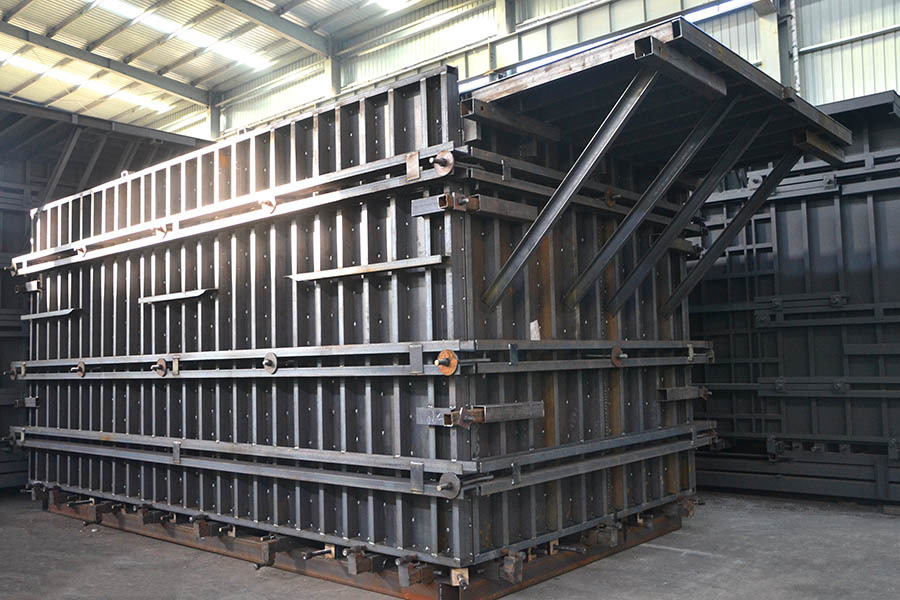
Choosing a mould material on site rarely comes down to a single obvious answer. Steel holds up under repeated pours and high pressure, but it is heavy and needs lifting equipment when you move it around. Fibreglass is far lighter and gives a smooth finish straight from the mould, yet it can crack if handled roughly on a busy site. Timber remains the go-to for one-off pours or unusual shapes because it is cheap and easy to cut, but expect warping after a few uses and extra surface prep if you need a clean face.
Think about how many pours you actually have lined up and how often the crew will relocate the forms. If the mould needs to be shifted by hand or used at height, the weight saving from fibreglass often beats steel's long-term durability. For a high-volume run where the same shape repeats dozens of times, investing in steel makes sense despite the upfront cost. Timber fits short runs, curved profiles, or sites where you can afford to replace the mould after each pour without holding up the schedule.
Weather and storage also play a bigger role than many people expect. Timber swells and loses shape if left in the rain, steel rusts unless it is coated and stored properly, and fibreglass resists moisture but can be punctured by sharp impacts. Match the material to the site conditions you actually have, not the ideal workshop setup, and you will avoid most of the headaches that come from the wrong mould choice.
Tolerances and Surface Finish: The Details That Show Up Later
Tolerances and surface finish rarely draw attention during the early design phase, yet they become painfully obvious once parts move from CAD to the assembly floor. A shaft that fits perfectly in a digital model can bind or wobble after machining because each feature carries its own allowed deviation. When those deviations stack up across mating components, even a well-intentioned ±0.1 mm callout can produce an assembly gap that frustrates technicians and forces rework.
Surface finish, on the other hand, is often dismissed as a cosmetic concern until a seal leaks or a bearing runs hot. The roughness left by a cutting tool directly affects friction, wear, and how well two surfaces hold a lubricant film. A pocket that looks smooth to the naked eye may still have enough peak-to-valley texture to tear an O-ring during installation or create a path for pressurized fluid to escape.
What makes these details difficult is that they are easy to overlook in a 3D rendering, but expensive to correct after tooling is made. Tighter tolerances and finer finishes almost always raise machining time and inspection costs, so the trick is to assign them only where function really demands it. By thinking through fits, seals, and contact surfaces before releasing drawings, you save yourself from discovering the consequences weeks later on the production line.
How Many Reuses Do You Need From One Mould?
When you invest in a mould, the first question isn't about price per unit—it's about how many cycles that mould can realistically deliver before tolerances slip or surface finish degrades. Most manufacturers will quote a conservative number, often based on tool steel grade and expected maintenance intervals. But the honest answer depends on your production volume, material choice, and whether you're willing to trade a bit of dimensional accuracy for extra shots down the line. For high-volume consumer parts, a well-built aluminium mould might give you 50,000 to 100,000 cycles, while hardened steel easily pushes past a million. The trick is matching that lifespan to your actual forecast instead of paying for longevity you'll never use.
Mould reuse isn't just about hitting a magic cycle count—it's about planning for what happens between those cycles. Every ejection, every injection pulse, every temperature swing introduces micro-wear that compounds over time. If you need 200,000 parts, a mould rated for 150,000 requires a refurbishment halfway through, which means downtime, extra cost, and potential variation between early and late production runs. On the other hand, if you only need 10,000 parts, a high-end steel mould is overkill unless you're planning a second production run later. Smart buyers ask for a wear curve, not just a single number, so they understand how the part quality shifts as the mould ages.
A practical approach is to define your break-even point: how many reuses make the mould cost disappear into the per-part price. If a mould costs $20,000 and runs 100,000 cycles, that's $0.20 per part—but only if you actually use all 100,000 cycles. If your project stalls at 20,000, your real cost jumps to $1 per part. This is why prototyping with softer tooling or rented moulds makes sense until demand is proven. Once volume stabilises, buy the mould that hits your reuse target without excessive margin, and schedule preventive maintenance based on cycle tracking rather than guesswork.
Does the Supplier Offer Spare Parts and Technical Help?
Before committing to a machine purchase, many buyers overlook the long-term reality of maintenance. A supplier that offers genuine spare parts—not just generic alternatives—can save you days of downtime. Ask for a list of critical wear components and how quickly they can ship them to your location. Technical help matters just as much: can you reach an actual engineer by phone or video call, or are you stuck with a chatbot and a ticket queue? Real support often shows up when a gearbox fails on a Friday night.
Suppliers that maintain regional spare parts depots or partner with local distributors tend to respond faster than those shipping from a single overseas warehouse. Find out if they offer troubleshooting guides, wiring diagrams, or online diagnostic sessions as part of the purchase—these aren't extras, they're part of the product's true cost. A responsive supplier will often share a service-level agreement (SLA) for parts dispatch, typically within 24 to 48 hours for urgent breakdowns.
Don't settle for vague promises. Ask for concrete examples: 'What's your average lead time for a control board?' or 'Can you walk me through a common calibration issue on a video call?' If the sales team hesitates or defers every question to an FAQ page, consider that a warning sign. The best suppliers treat spare parts and technical help as an ongoing relationship, not an afterthought.
Request a Trial Panel Before Committing to the Full Set
Ordering a full set of panels without seeing a physical sample can feel like a leap of faith, especially when colors shift dramatically depending on the light in your space. Most suppliers will send a small trial piece for a modest fee or even free if you ask, and that single panel often reveals more than any online photo ever could.
One trick is to move the sample around the room at different times of day. Check how the texture catches both natural and artificial light, and hold it against your existing furniture or flooring. Many people discover that a color they loved in a catalog looks completely different against their own walls, and it is far cheaper to learn that from one panel than from a pallet of forty.
Beyond color, the trial panel is your chance to test durability. Run a fingernail across the surface, wipe it with a damp cloth, and leave it in a sunny spot for a few days if possible. If the material scuffs, stains, or fades at the sample stage, imagine what daily life will do to an entire room. Getting that one panel takes a few days, but it prevents the kind of regret that lingers long after the boxes are opened.
FAQ
Look closely at the joint alignment and how the panels lock together. A mould with tight, uniform seams gives you clean edges and fewer hours with a grinder. Also check if the steel has been stress-relieved; cheaper moulds often warp after a few heating cycles.
Ask the fabricator about the steel grade and thickness. Moulds made from Q345 or similar structural plate tend to keep their shape longer than thin mild steel. Ask for references from builders who have done at least 200 pours with the same mould, not just a brochure claim.
If your wall panels are fairly square and you use common room dimensions, a standard adjustable mould can be fine. But if you have unusual corners, window openings, or an architectural finish on both sides, the extra cost of custom fabrication often pays for itself by avoiding cast-in mistakes.
Focusing only on the upfront price and ignoring the demoulding angle. A mould with insufficient draft or poorly positioned knock-out points will make every strip feel like a wrestling match. That time loss adds up faster than the savings from a cheaper unit.
Directly tied to what your concrete will look like. If the mould face is pitted or roughly welded, you'll be patching every panel. Look for a ground or polished contact surface, especially if you want a smooth exposed concrete look.
Some designs use changeable side rails or spacer plates, which works for small adjustments. But be careful: if the range is too wide, the vibration pattern changes and you may get honeycombing at the edges. Keep thickness variation within about 50 mm unless the manufacturer confirms otherwise.
Yes. The mould's frame needs to transfer vibration evenly. Thin, flexible side plates will shake and chatter, leaving air pockets. Ask about the rib spacing and whether the mould has been tested with your type of vibrator, external or table.
Absolutely. A large one-piece mould might be cheap to build in the factory but impossible to get onto your site. Look for modular designs that break down into sections you can move with a standard forklift and reassemble in a day. Check if the manufacturer includes a leveled base frame or if you need to pour a foundation for it first.
Conclusion
Choosing a prefab concrete house mould starts with the actual structural element you plan to cast. A load-bearing basement wall has very different demands from a decorative facade panel or a lightweight partition. This decision narrows the field before you even look at materials. Once the purpose is clear, think about whether steel, fiberglass, or timber makes sense on your site. Steel handles high reuses and tight tolerances but is heavy and costly upfront. Fiberglass offers a smoother finish and easier handling for complex shapes, though it may wear faster under rough handling. Timber remains a budget option for low repetition jobs, but expect more surface variation and shorter life. Tolerances and surface finish are not trivial: a mould that deflects slightly under pour pressure can transfer visible waves or misalignment into every panel, especially once natural light hits the installed wall.
Then consider how many reuses you actually need. A mould built for 200 pours is wasted money if you only plan a small extension, just as a cheap timber mould will disappoint on a multi-unit project. Ask the supplier about replacement parts and whether real technical support is available after delivery, not just a sales contact. Many issues appear after the first few pours, when hinges loosen or seals wear. Before committing to a full mould set, request a trial panel. Pour one unit, check dimensions, surface quality, and ease of demoulding. This single step often reveals adjustments that save weeks of rework. By weighing structure type, material choice, tolerances, reuse count, supplier backup, and a verified trial panel, you can choose a prefab concrete house mould that fits both the build and the budget without hidden surprises.
Contact Us
Contact Person: Zhang Zhenlai
Email: [email protected]
Tel/WhatsApp: 8618563210000
Website: https://en.lugongmachinery.com/